No products in the cart.
×
- News
- Sewing Patterns
- ITH Patterns
- Accessory Patterns
- Products
- Free Tutorials
- Help Center
- Gift Cards
I love hand embroidery! It's ever so relaxing and the results are fab! Don't be intimidated, it doesn't have to be perfect, that is the beauty of handmade, each doll is unique! In this tutorial I'll be showing you Step by Step how to Hand Embroider my Top 6 Favorite Embroidery Stitches for Doll and Soft Toy Plushie Faces. These are all very basic, easy stitches so that even a beginner doll or softie maker can embroider lovely faces for their new creations that are not only beautiful but baby safe!
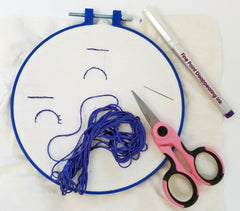
What you will need is some good quality kona fabric for your face. Trace your face onto your fabric using a disappearing ink pen, embroidery thread & a Sharp needle. It's easier if you have an embroidery hoop but not necessary. You can hand embroider onto a stuffed dolls head or a flat piece of fabric.
Need a recap on just a couple of stitches?! Each video will start with the stitch you are after!
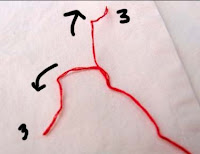
✂️ Outline stitches are great for eyes, eyebrows, mouths and whiskers etc
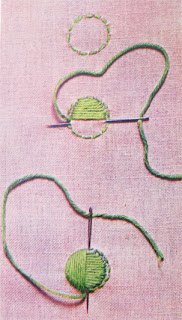
✂️ Fill Stitches are brilliant for cheeks, round eyes and lips. An outline stitch isn't necessary - I prefer it as it helps to keep my edges neat.


