Let's make some super cute Christmas Tree Ornaments!!! This is such an easy fun way to create adorable Ornaments to give as gifts or add to your tree each year!
 Of course you can be super festive and use any of my Christmas Patterns .. but also why not try some others .. like a cute fox or teddy!! How darling!

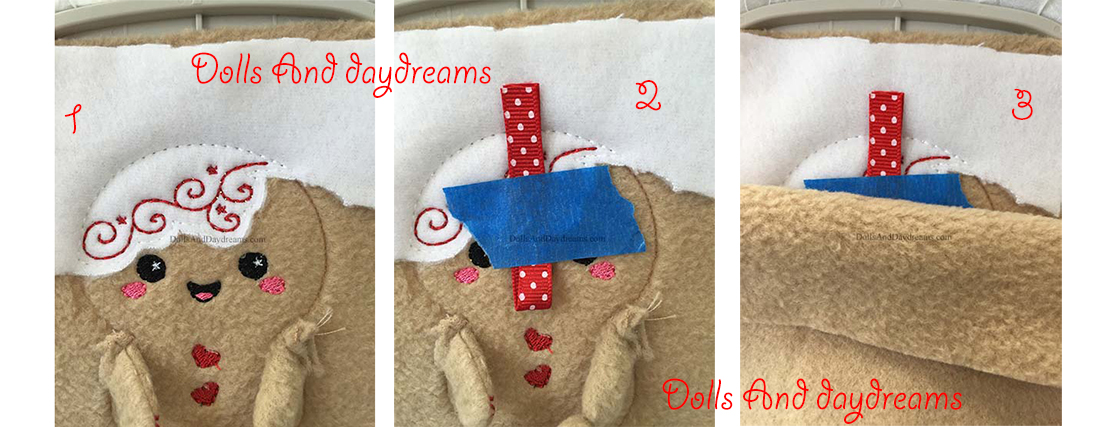
ITH - Use your 4x4 size
- Before you add your back fabric
- Tape a piece of folded ribbon - with the loop facing down towards your stuffies tummy and the raw end (sealed with either a light, fray check or in a knot) sticking up out of the top of the center of the head by about 1/2 inch.
- Place your back fabric right side down.
- Run your last Step to secure it in place.
- Turn and stuff ... ta-da!!

Sewing Patterns
For the larger Sewing Patterns (18 + inches) reduce the pattern by 60%. For the Sew Cute Stuffie range by around 70% . Tiny Tot works perfectly as you can see from Lynn's cuties below!
Whip stitch a loop of ric rac or ribbon to the back of your softies head this way you can remove it if you want him to be a doll/toy again for the rest of the year.

Or
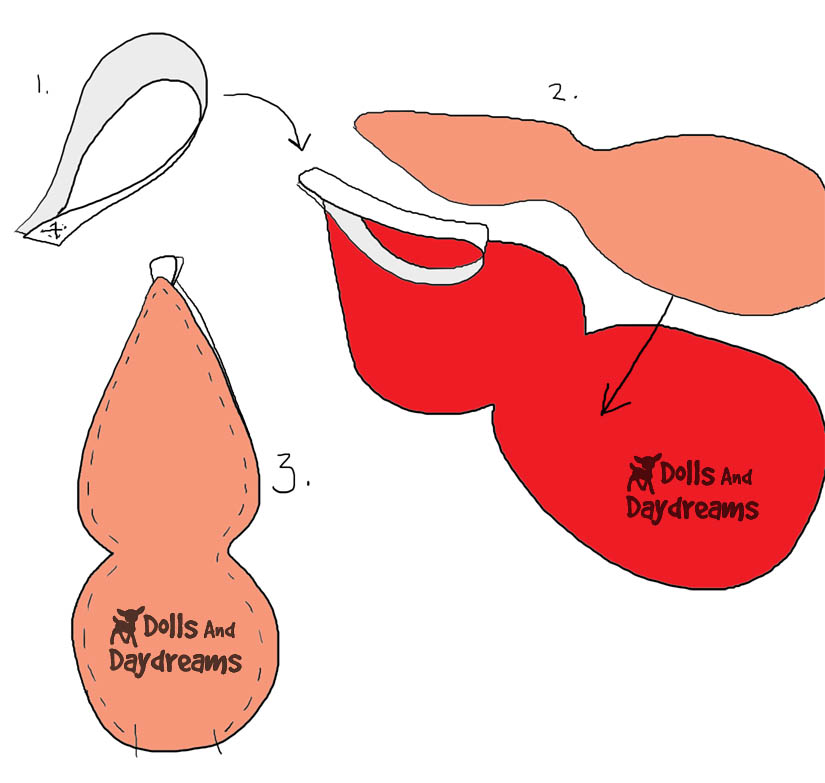
- Place your front body/head fabric on the table right side up.
- Place the ribbon loop facing down towards your stuffies tummy and the raw end (sealed with either a light, fray check or in a knot) sticking up out of the top of the center of the head by about 1/2 inch.
- Place the back of your doll fabric, right side down, over the front creating your sandwich. Sew around the outside with your 1/4 seam allowance.
- Turn your softie. Ta da! All done!
Don't forget an Angel for the Top!