Here's a little summery of my Doll & Softie Toy making Tips, Tricks, Techniques & Troubleshooting that I've complied and I thought I'd share with you all. I'll be adding to the list as I think of more to include! Enjoy!
All tool links are to items I use.
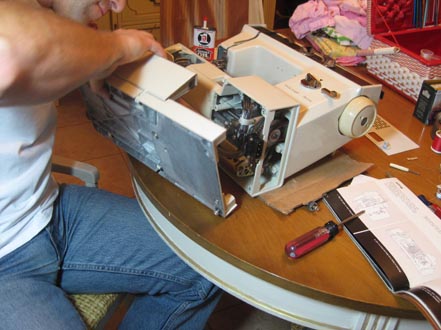
Sewing Machine
Get to know your own machine, play around with it and have fun.
Change your needles regularly and always have the
same thread on your spool as on your bobbin to make sure it runs smoothly.
And take it in for a regular check up (don’t let hubby have a look no matter how many oil changes he’s done on the car, trust me, this baby will baffle him!)
Basic Sewing Supplies
Seam Ripper. We all use one, admit it! Don’t be shy, it makes your life so much easier!
Pins. Make sure your pins are not rusty, dull or bent. They should be fine for fine fabrics. For most projects the cute pearl tip pins are just peachy.
Marking Tool. I don’t like the disappearing ink pens as sometimes they can reappear, and that’s not good if you have used it to sketch out your face template! I recommend
tailor's chalk/pencils.
Cloth measuring tape is very handy!
Good quality
all purpose thread and sewing machine
needles.
Do you sew on a
European Machine or work in cm not inches ? Want to know my trick for keeping a constant 1/4 seam allowance? I use my machines 'Quilter' foot it creates the perfect 1/4 seam when you line the edge of your foot up against your fabric.
Cutting
ToolsI love my
Rotary Cutter
. It’s amazing for curved edged like heads and really fast.
Pinking Shears

and decorative edge (scalloped) pinking shears are fun to change up your pattern pieces and add a bit of interest to felt.
Rotary Cutting Mat

, allows you to work with your rotary cutter and not worry about damaging your table top.
Good sharp pair of Fabric Scissors Shears

that you ONLY use for fabric.
Remember if you use it for paper (or any of your cutting tools for that matter), it will blunt them over time.
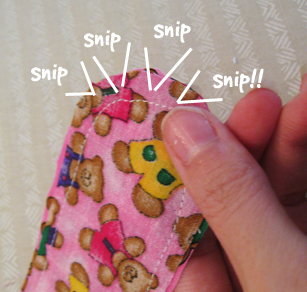
Technique.Don’t forget to clip your curves when making dolls and toys, this enables you to ‘pop’ the curves out. ... And cut your squared corners off :) Just don't cut through your stitches!
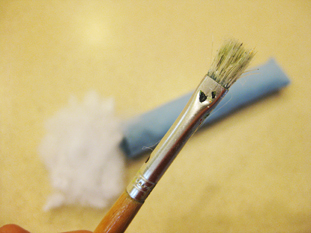
Turning Limbs.
Tools & Technique. You can use your fingers, or on stiff fabrics and thin limbs use some tweezers to help pull them the right way. Once you have the majority of the limb turned, you can use a paintbrush/chopstick to poke the last bit out properly and ‘pop’ the curve.
Stuffing
Arm & Leg Don’t over stuff your arms and legs as this makes it difficult when sewing around your dolly sandwich.
If you have never sewn a doll before start with a
very light stuffing and as you get a bit more experience with your machine you’ll be able to add more and more stuffing.
Always leave at least a ½ - ¾ inch gap at the top of your arms and legs. The firmer you stuff your limbs the bigger the gap. Why, because otherwise your doll is very hard to sew up. Don't worry .. you won't get an 'empty' gap at the top of your limbs using this method .. simply rearrange your stuffing after you turn you dolly and ta da ... pretty limbs! Hooray!
Tip - If you’re worried about movement of your limbs (& hair bunches or ears) you can baste/tack them down to the front body panel (or head in the case of ears) before making your doll/softie sandwich.
Don't forget to stick your limbs 1/4 inch over the edge of your body fabric before you sew up your softie/dolly sandwich. This means less bulk from your limbs inside your dolls body.
HeadsI always like a lot of stuffing in my heads and necks as if not dolly will not be able to hold her head up and will have lots of yucky wrinkles (pockets of space in the stuffing when it is too loose) around the side of her face. Be careful though ... if you over stuff a head it can start looking lopsided as it will warp your thread directions in the cotton.
Tools.An old paintbrush or chopstick works wonderfully to get into all the corners.
Technique.Always pull apart your stuffing before you use it. Then add small bits at a time and compact them down/place them using your chopstick or paintbrush.
What stuffing to use?Poly-Fil
(synthetic) is relatively cheap and easy to come by. It will give your doll a cute plump fluffy look, you’ll have to work a bit to get the wrinkles out of the head and neck area but it holds up well. Careful to fill all the 'holes', they can reappear down the road.
A large bag (32 ounces)of stuffing will make 4 - 5 dolls/softies with their bodies firmly stuffed.
Bamboo (natural) is lovely but pricey, and stuffs well. Hardly any wrinkles in dolly but can be lumpy so watch out, however it holds its shape amazingly.
Wool

(natural) holds its shape very well, pricey, but no lumps and bumps and adds a bit of weight to the doll which is nice.... and a little goes a long way!
I don’t recommend pellets or beads (or beans or grain) all of these products can be dangerous to small children and makes your doll lumpy bumpy.
How to close your doll after Stuffing.Check out my Ladder Stitch Tutorial.
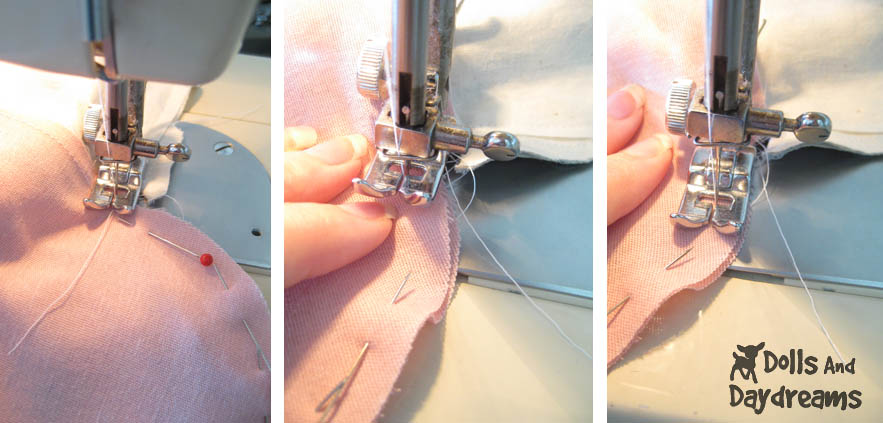
Sewing doll and toy necks.
This is probably the trickiest part when sewing up your dolly. The key is to always line up your back body and front body neck seams and pin it in place well.
 |
| Click for a larger photo |
Technique.Take your time sewing around the curve.
Stop, put up your machine foot (needle still in fabric) and change the direction of the fabric by pivoting around the needle. Start again. You can do this as many times as you like. No one is watching you. I do this!!
Rearrange the feet/legs if you need to through the fabric sandwich. Remember if you’ve over stuffed them it will make it tough to go around this tight corner…. Again take your time.
Don’t forget to clip the neck curve afterwards, otherwise the neck will pucker.
Cotton Fabric.
Always use a high thread count
100% cotton fabric.
Skin colors - think - white, off whites, unbleached cotton, creams, beige, light pink, DIY your own with a 'tea stain' .... and/or brown, light brown, honey, camel ......
Poly cotton blendsYou have to be very careful with poly cotton blends. They can not only warp when you iron them creating puckering in the fabric but they will lie oddly if draped as clothing and cause strange shapes or twisting of limbs when stuffed.
What's a thread count?Thread count means the number of threads woven together in a square inch. The higher the thread count the better quality of cotton. An easy way to find out if your cotton has a high thread count is to pop your hand behind it. If you can see your hand through it, it means it has a low thread count so move on!
What cotton do you use for dolls faces and limbs?I love Kona cotton especially for my dolls faces and limbs for its high thread count, nice colors and it helps that it sews like butter! You can find Kona cotton in most quilting and fabric stores.
Cutting your pattern out in cotton. Unless otherwise directed in the pattern - always lie the pattern pieces along the grain (the weave in the fabric) and so that the maximum stretch runs down the length of the pattern piece, e.g. top of the head to neck, top of the leg to the foot etc
Felt
What Felt to Use?
Craft Felt, 100% polyester, cheap and cheerful but will not hold up in the long run especially to lots of cuddles and kisses. It will start to pill and ball up and look very messy in no time.
Felted Wool (100%) natural. It’s thick, too thick for me. Think of a wool hat or heavy wool coat.
Pure Wool & Wool blend (wool and rayon) will NOT pill, shed, or stretch out of shape like acrylic or polyester craft felts. I highly recommend this for all your toys and dolls. It might be a little more pricey but your dolly will remain beautiful for years to come.
Making felt clothes/shoes.
Just as felts can be made of different material felts can come in slightly different thicknesses also, ranging between 3-7mm and 1/8 to 3/8 inches. Due to this some of your felt clothes & shoes may be a little difficult to get on your dolly. So do a test set first. If it’s a bit too snug add 1/8-1/4 inch to your seam allowance, or give it a little stretch (works with craft felts).
don't have freezer paper, don't worry why not try
Cutting Out Felt Shapes Using Tape.
Fleece Fabric.
Anti-pill fleece.For fleece as with felt I recommend an
anti-pill fleece as your softie/doll will be getting a lot of love. It might be a little more pricey but your dolly will remain beautiful for years to come. There are lots of different thicknesses you can find out there, some that even look like faux fur. I use a normal thickness anti-pill fleece for all my creations.
The main difference between no-pill fleece and pill fleece is the quality. Pill fleece is typically of a lesser quality, which means it’s also less expensive and will bobble up. No-pill fleece costs more but it’s a better quality fabric. You should be able to find it at any good fabric store
Cutting your pattern out in fleece. Unless otherwise directed in the pattern – always place the pattern pieces with the pill running down the length of the body and limbs (in the same direction).
Key to sewing fleece ..... Lots and lots of pins .... and then a few more hahaha Take your time sewing it especially around curves. Fleece has a tendency to stretch so don’t pull your material as it will cause wonky lines …. Nobody wants a dolly with one arm longer than the other :)
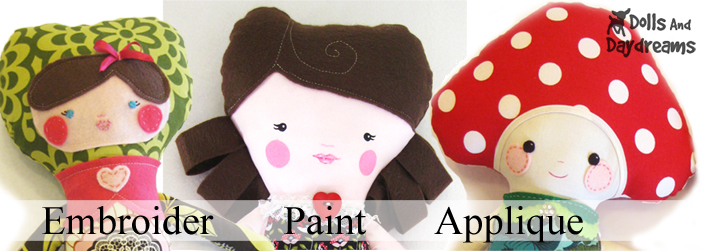
Faces
Use your pattern face templates to
embroider your face,
paint your face or even cut out
felt or cotton applique shapes and sew your faces on! In fact, who says you need to use the faces provide make up your own!
Technique.Use a tailor’s chalk pencil to
trace your face pattern through the fabric. If it’s a light colored fabric you’ll be able to see the pattern easily. If not, or you are using a dark fabric use a light box. Don’t have a light box, simply hold your pattern and fabric up to a window on a sunny day :)
Take a look at my
How to Paint a Dolls Face - Free Tutorial and my
Embroidery Techniques for Doll and Softie Faces Also have a look at my Tute on
How to Customize Your Dolls and Softies
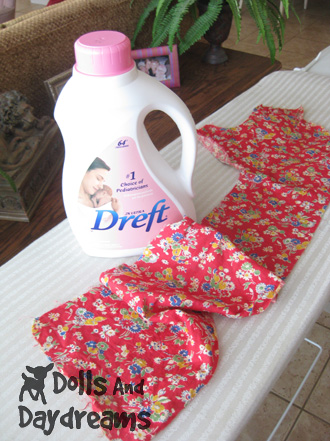
And last but not least ........ Always Prewash your cotton fabric and iron it afterwards. Your iron is your friend! Trust me, it makes pinning seams, doll clothes hems, etc so much faster!