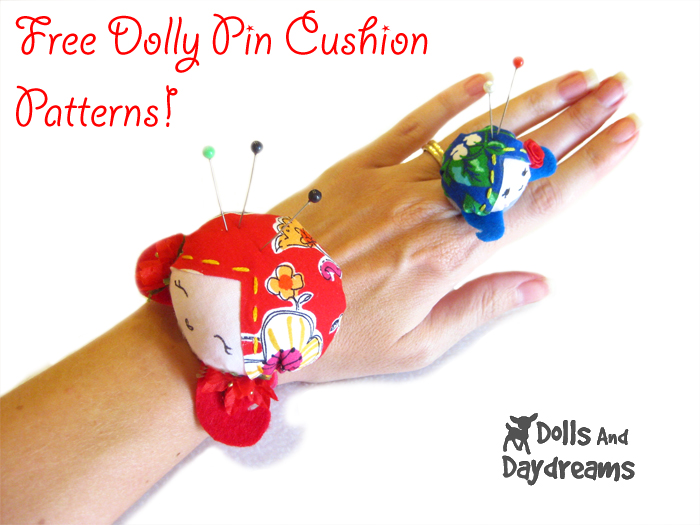
I adore my
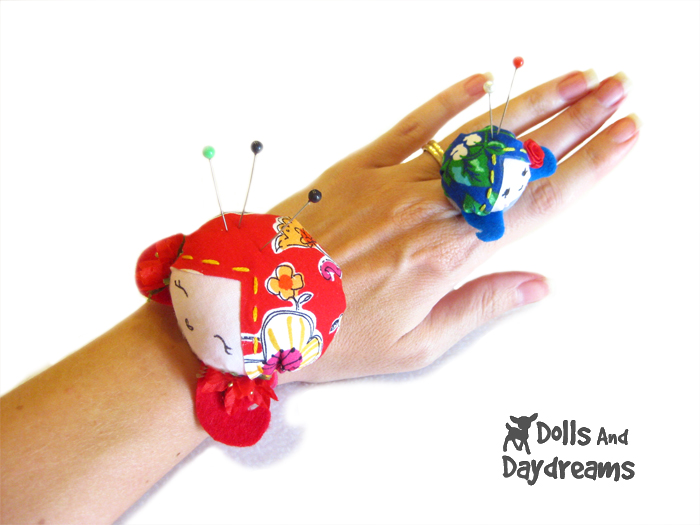
New Wrist and Ring dolly daydream pin cushions and use them every day! These two kawaii cute girls not only helped me use up some of my favorite scrap material … but I got to recycle plastic bottle caps as well!
This month marks the SECOND ANNIVERSARY of my Dolls and Daydreams one-of-a-kind doll and softie sewing patterns.
Hooray! So what better way for you to join in the celebrations than with a new, completely different pattern ...... just for you. And the fun part – it’s free! I want to share them with you all as a “Thank You” for being so supportive of me and my work!
Thank you for making the Dolls and Daydream Community what it is today! Please feel free to show off your finished pin cushions on my Facebook wall :) Can't wait to see them! 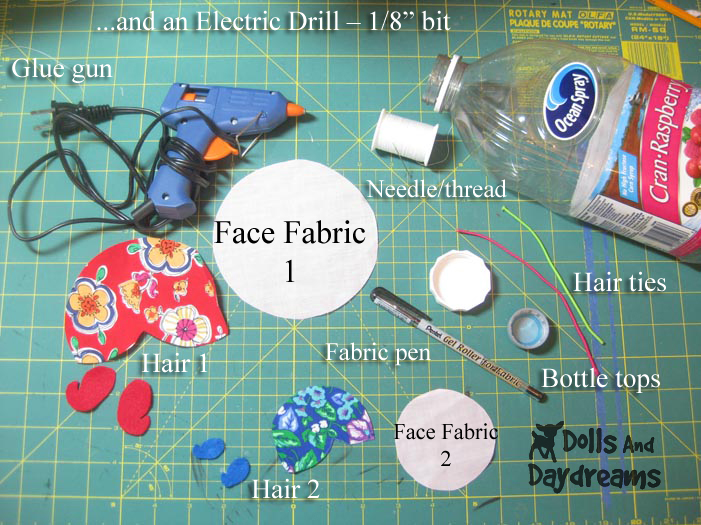
MATERIALS
- Glue Gun
- Electric drill – 1/8’ bit
- Needle & thread
- 2 inch plastic bottle top – wrist pin cushion (A) (mine was from a juice bottle)
- 1 inch plastic bottle top – ring pin cushion (B) (mine was from a Pepsi bottle)
- Hair ties cut in ½
- Fabric pen
- Scrap fabric face flesh color
- Scrap fabric hair color
- Scrap felt to match with hair color
- Polyfill stuffing
- Flower/bows etc
When printing out your pattern set your printer to No Scaling, No centering, No re-sizing, No Fit-to-page (different printers will use different terms!)
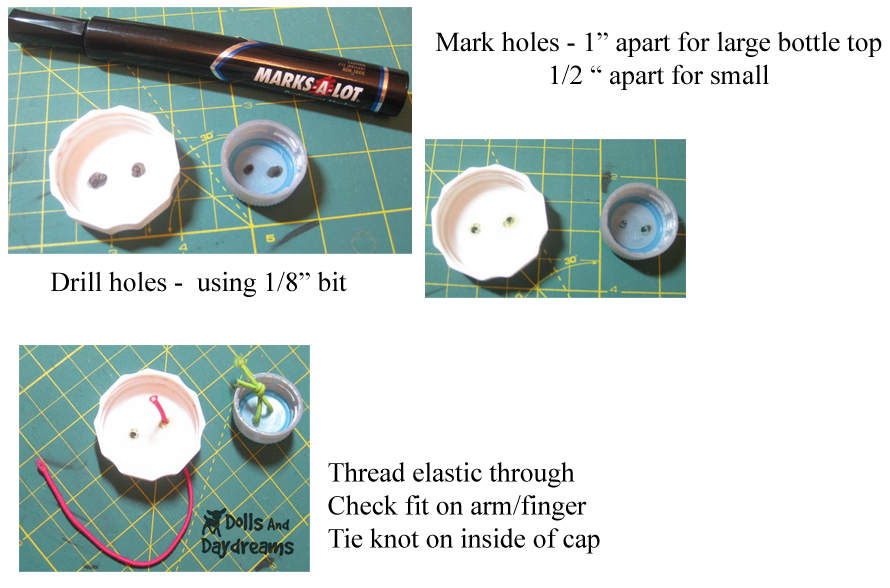
Don’t have a spare elastic hair tie, you can use a thin piece of regular ¼ inch elastic. Just make larger holes (or two holes next to each other to create one) to thread them through, and either knot or sew the ends together.
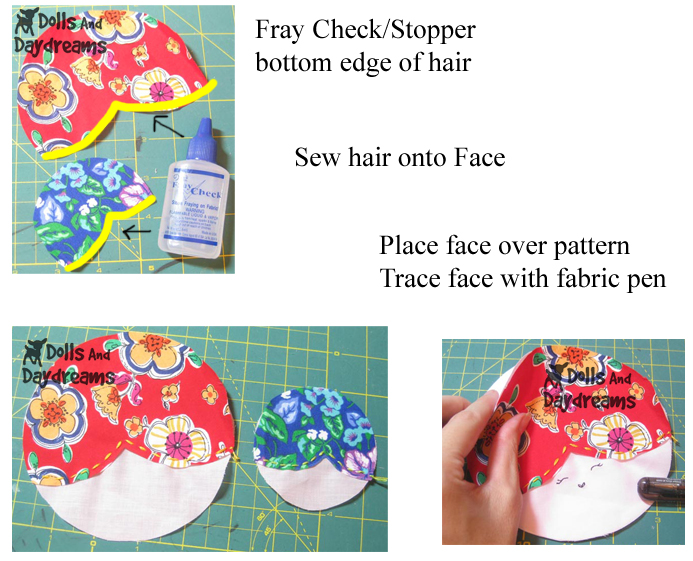
I used embroidery thread to add a bit more color and detail but you can use your machine or regular thread also. Don’t have Fray Check? Why not use you pinking shears along the edge of your hair or you can always substitute felt for the hair instead :)
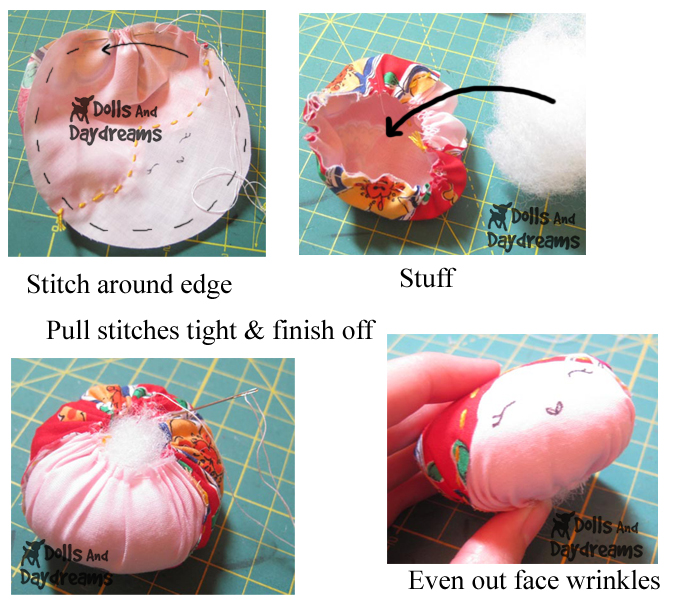
It’s amazing just how much stuffing you can add. Simply tighten up your little face ‘pocket’ and pop some more in …..
when you can’t fit any more in finish off with a knot. Flatten it under your hand so that it's more of a pancake shape rather than a ball.
The hole at the back doesn't have to close, don’t worry no one will see it!
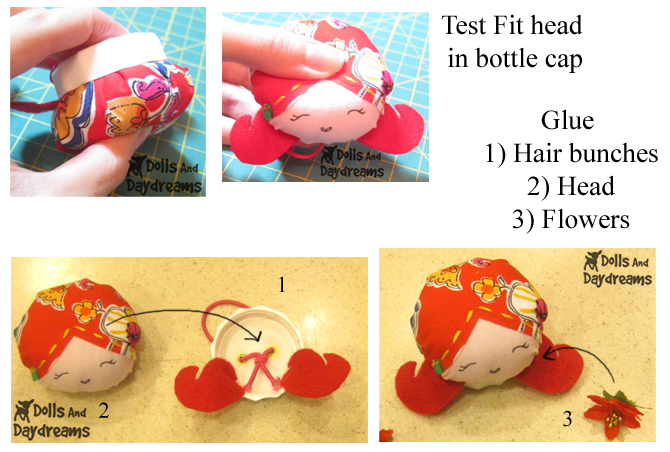
I always test fit my doll before I glue as it helps with my felt hair bunches placement.
Use the same method as above to make your ring pincushion!
The ring pincushion has been fabulous for my quick hand sew projects that only required some ‘holding’ pins … and my wrist one is lovely for in my work space every day ….. and also when I am doing some felt appliques on the sofa in front of a good movie after the kids have gone down …..
I did miss my scissors though … so I found a little pair I had saved from a free hotel sewing kit ….. sharper than I expected and nice and light weight ……….
I simply attached a ‘flower pin’ to them (1 large bead/button + elastic hair tie + pin).
They’re very practical & look super cute on my dolly’s head, she reminds me of a Geisha now!
Don't forget to pick up your pattern click the thumbnail below :)


